Easy Diy Farmhouse 6 Ft table Using Post
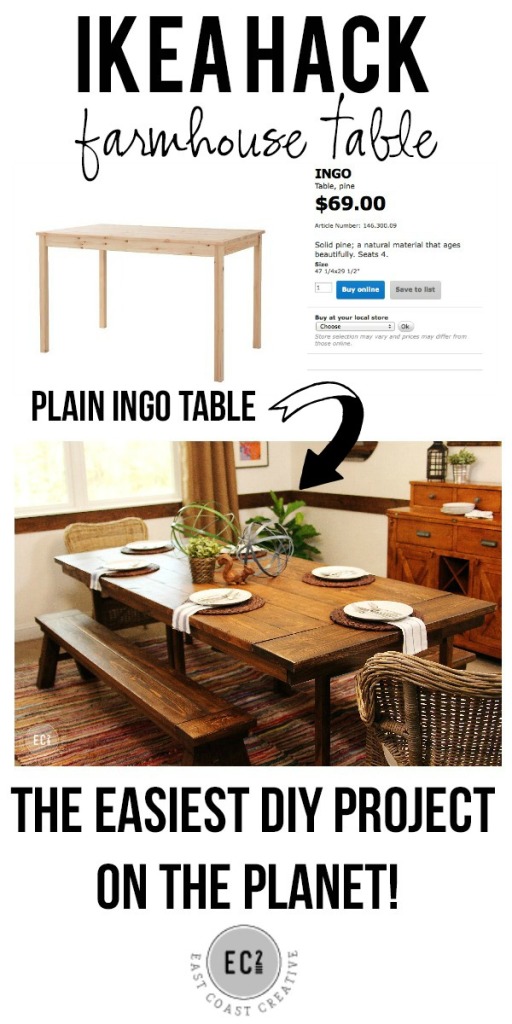

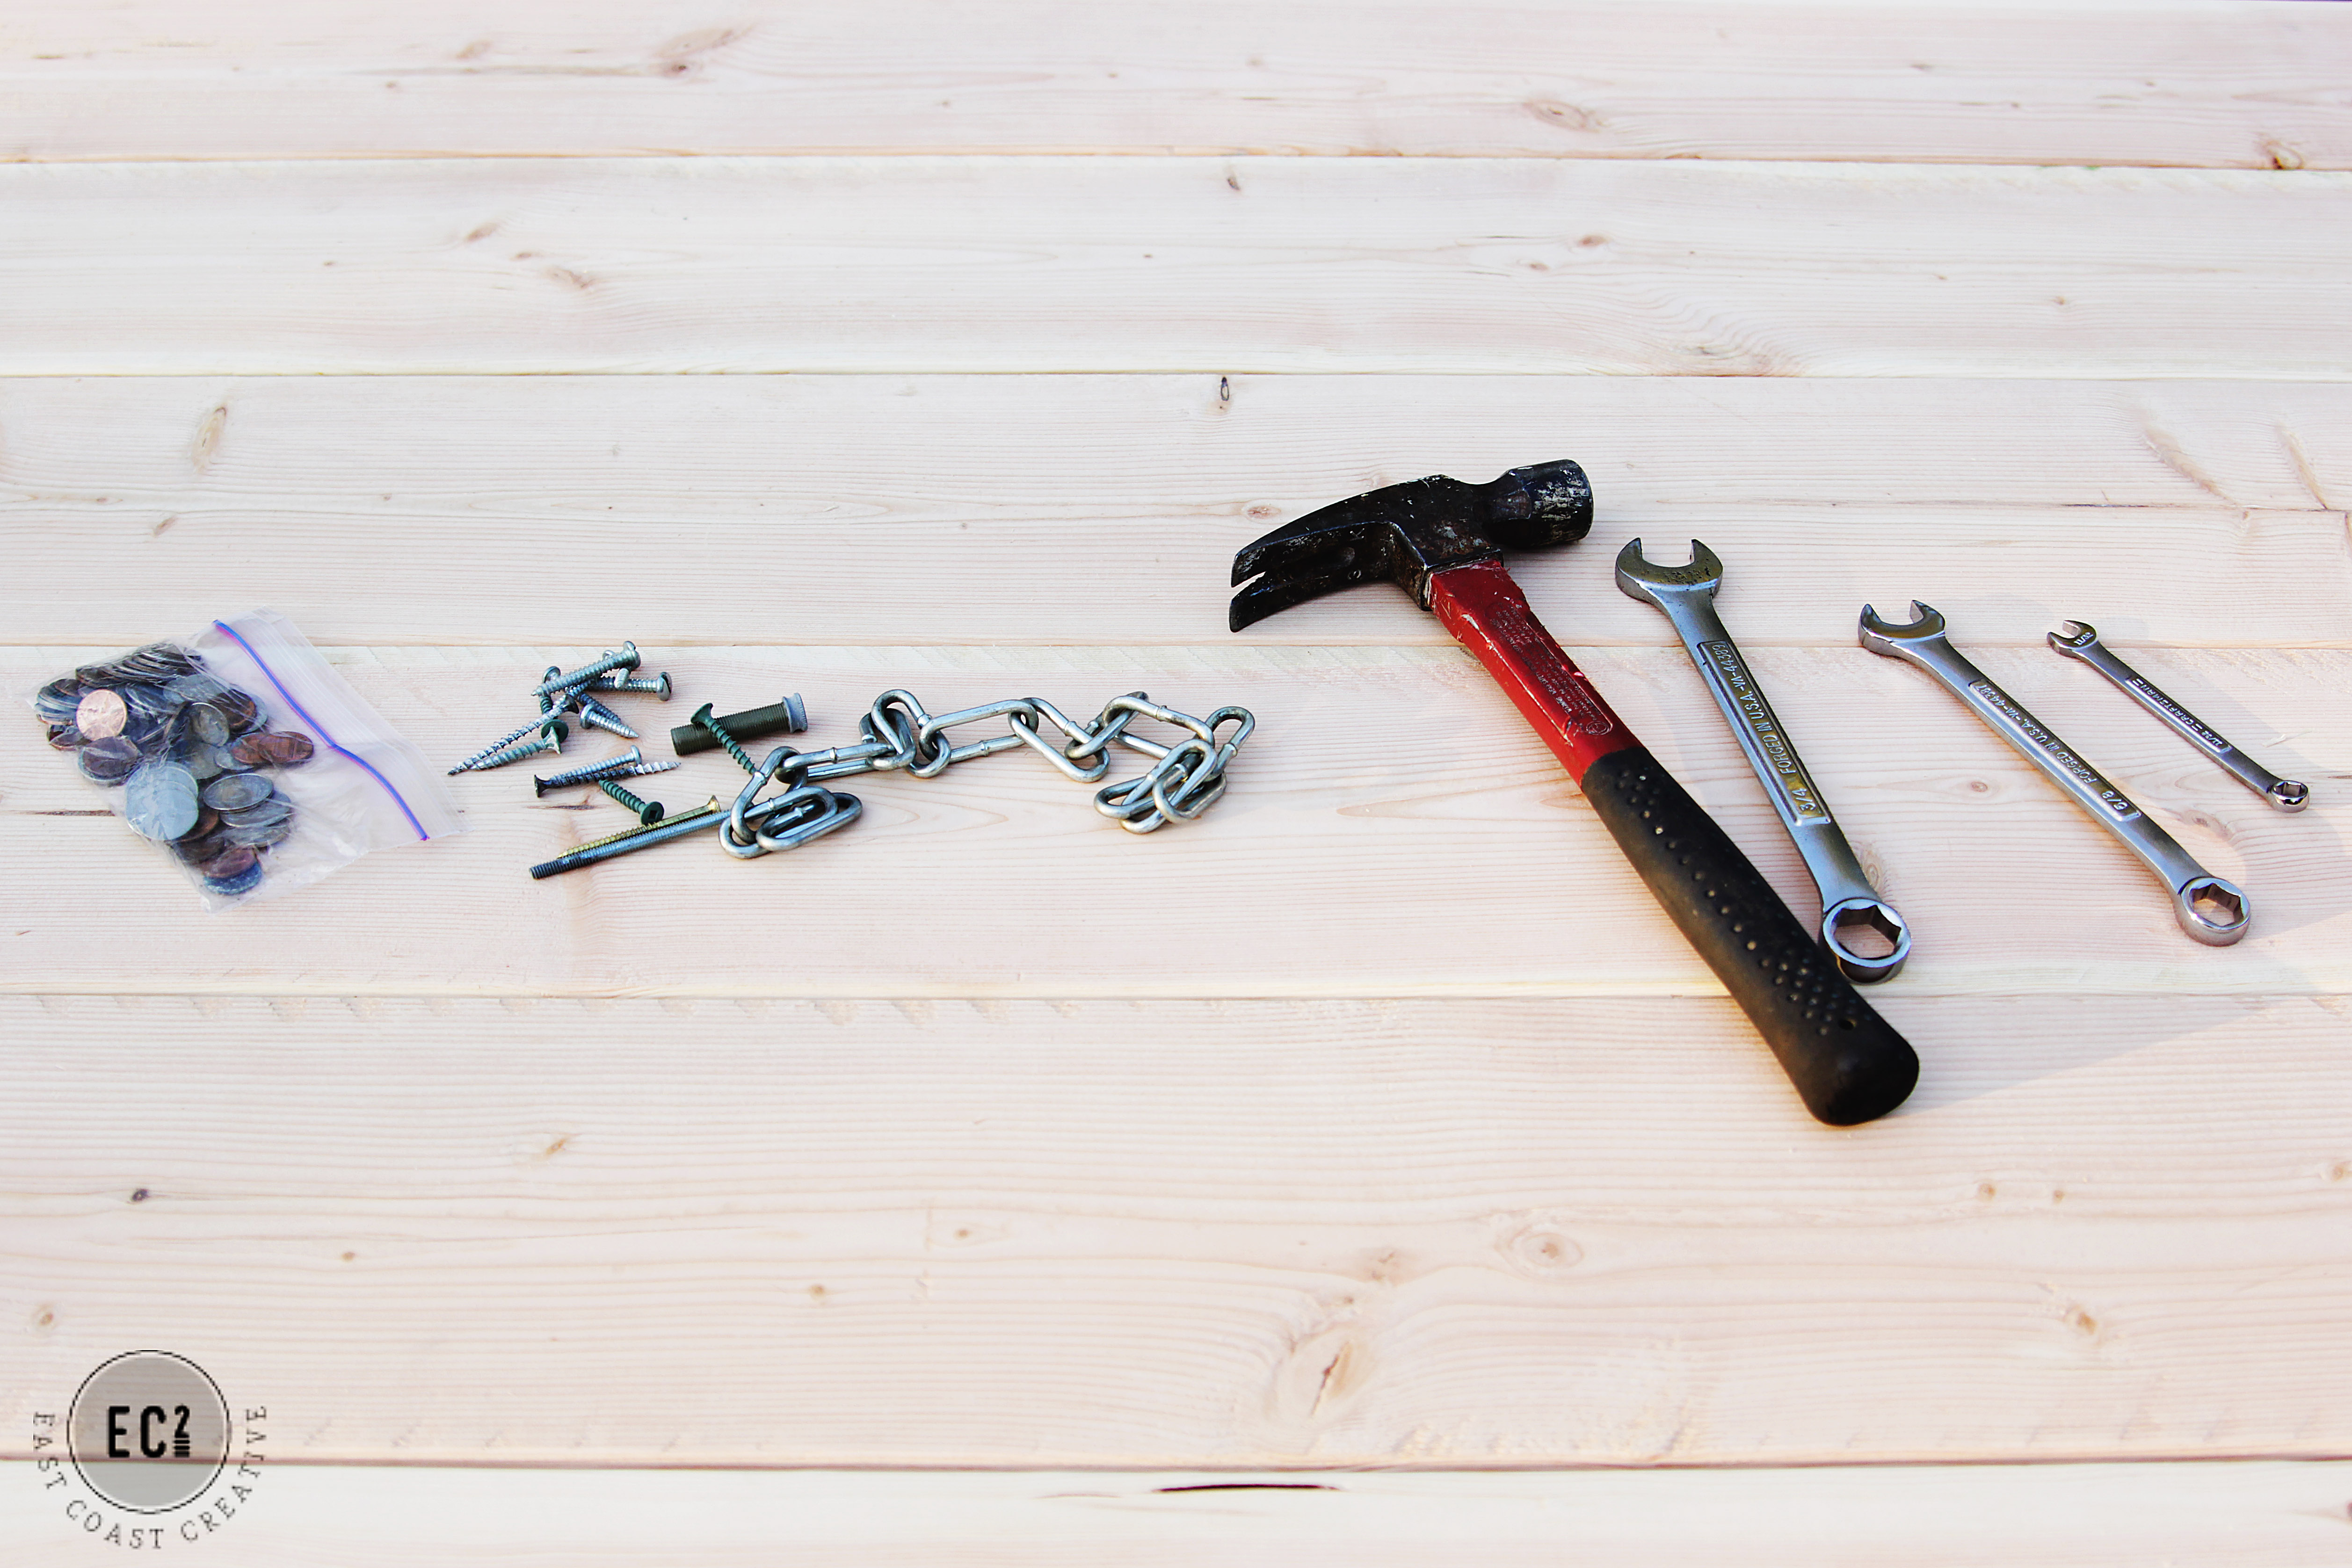
Ikea Hack: Build a Farmhouse Table (the easy way!) This project is not new to East Coast Creative Blog, actually it is one of our most popular posts of all time and it came way back when we first started the blog. Since now we have much prettier pictures, I'm going to give you all the steps and details here, but if you want to see the original Farmhouse Table that resides in my dining room, well check out the post here. It has a bit more of a modern flair than the traditional, rustic farmhouse style we did for this episode of "Knock It Off". 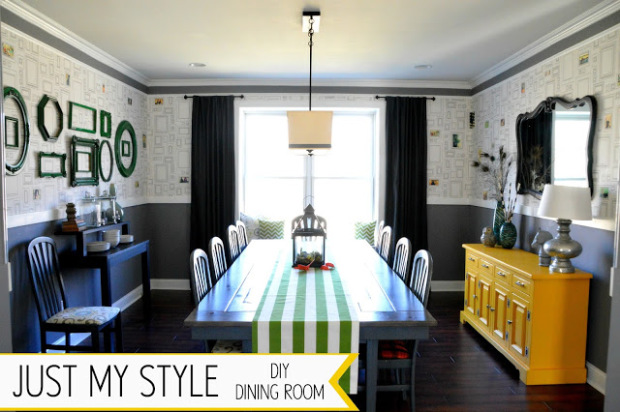 I'll walk you through each step of the project, but since this is our most popular DIY project-I've created a printable materials checklist. It has all the wood measurements, tools, my stain recommendations etc, so you can print it out and take it to the hardware store. I like things Easy Peasy! Use the button below to download your checklist.
Printable Project Materials Checklist
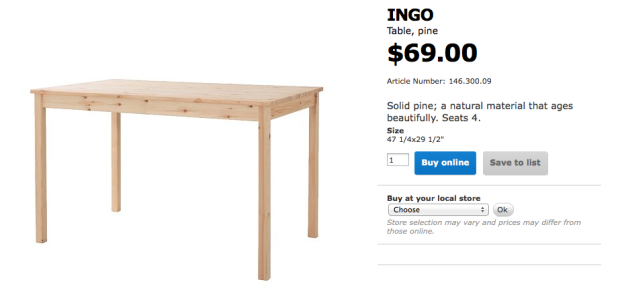
Step 1:Acquire 1 or 2 rectangular tables. One table if you want a little farmhouse table and two if you want a big mama that can seat a lot of people. Rather than trying to thrift two identical tables (which can be really challenging), we went with two wooden IKEA tables (the cheapest ones they sell!) but you can totally thrift two as well- that's what I did for my personal table.
Assemble your tables and put them on a level surface.
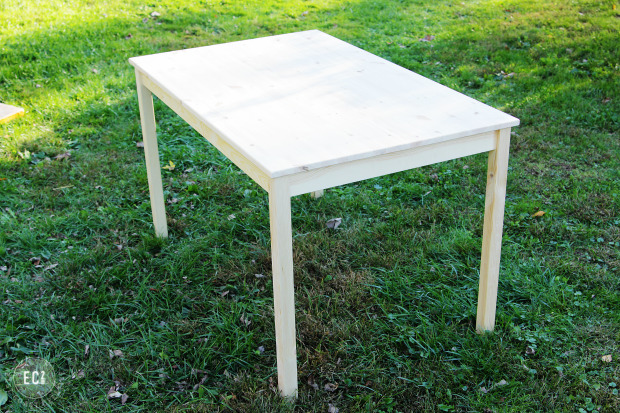
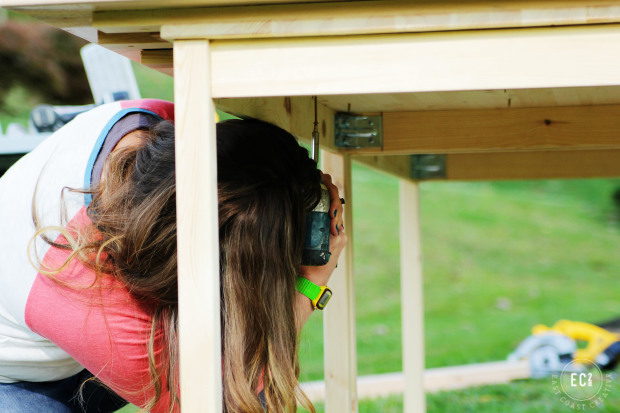
Step 2:Attach the tables together using a 1×3 pine plank and screws. It doesn't matter what the wood looks like, it's going to get covered up by fancy pine boards a little later. Just make sure the plank is screwed into both tables to connect them.
Step 3:Build a subframe using 1×2 inexpensive pine planks. So… cheap tables are cheap for a reason, they're not made super well and they're tiny. When I think of a farmhouse table, I don't think dainty and small, I think big and strong. So, this subframe is going to be your support so that you can make your table wider. The width is up to you, you will attach the 1x2s directly onto the table and they'll hang over the sides. You'll want them equal on both sides, but really the width is up to you. The table at my house is crazy wide, but the one we made for this farmhouse dining room was about 48″ when it was finished. Attach each 1×2 with screws directly into the table. We used about 3 screws per board.
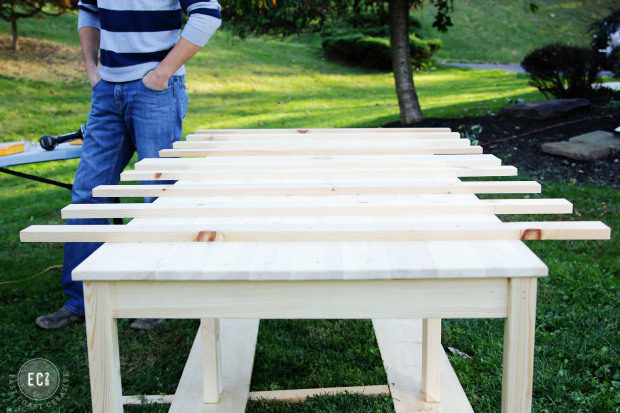
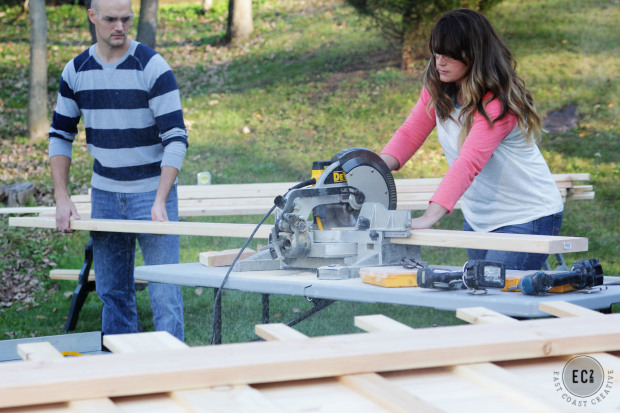
Step 4:Cut your "new" tabletop planks. Once the subframe is prepped, cut your 2×8 boards to length. When planning the length of your vertical boards, take into account that each end will have a horizontal end piece, so subtract about 8″ off of each side.
See how the vertical boards are "capped" with a horizontal?
Step 5:Sand down your boards, rounding the edges a bit to give it a finished look.

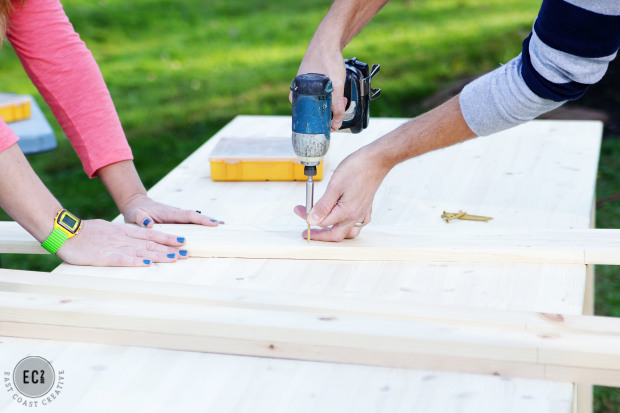
Step 6:Place your boards, and get your layout set. Once you're happy with your spacing, attach each board from the underside of the table using screws. Make sure your screws are long enough to go through the table, subframe, and top planks, but not so long that they pierce through.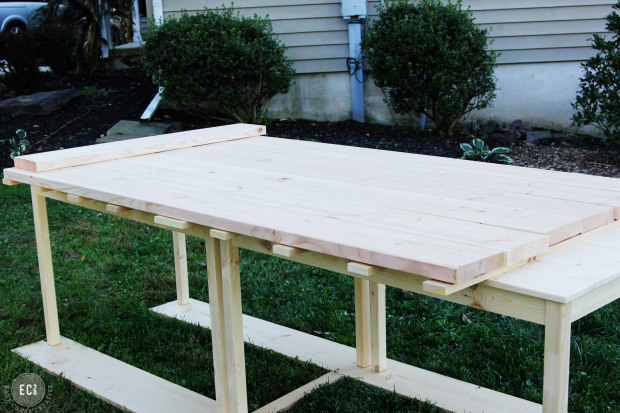
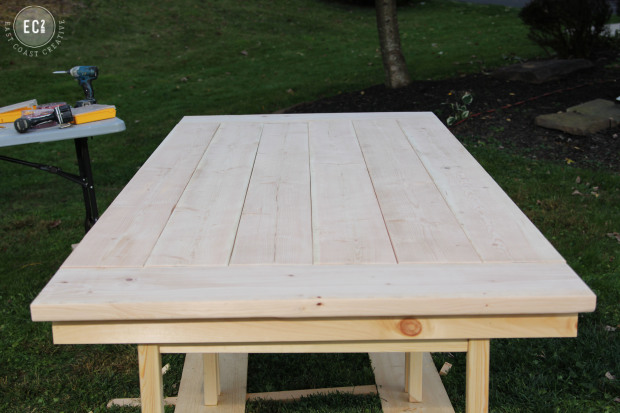
Step 7:This is an important step- you need to create an apron to hide the subframe and give the table a finished look. Measure and cut four 1×3 pieces of pine down to the size of each of the table's sides. Attach the apron onto each side, under the wide top planks, hiding the frame. This step might sound confusing, but if you think of it as hiding the evidence of your IKEA hack, then you'll be golden!
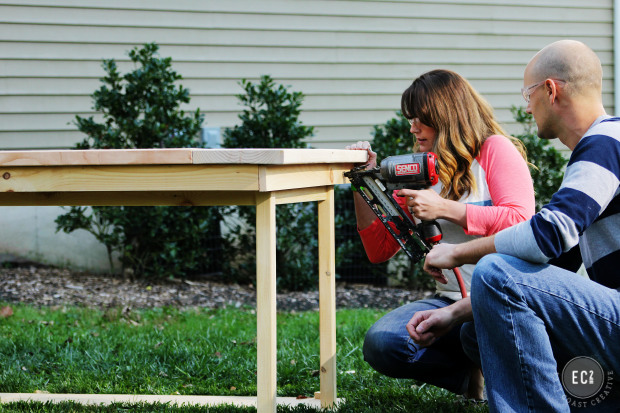
See how it makes the table look like it's always been a farmhouse table? That apron works wonders!
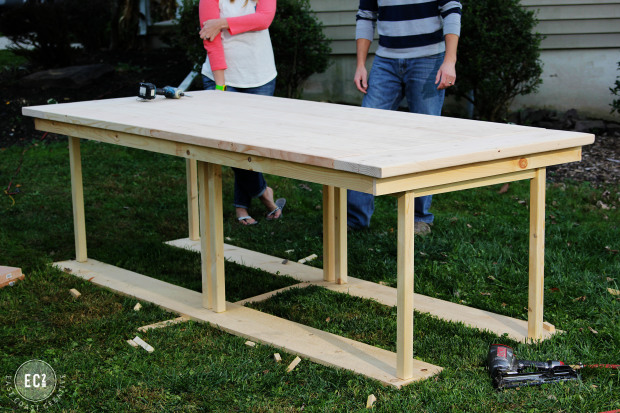
Now, let's talk about those skinny legs for a second shall we? While I'd kill for legs that thin, it's not the most attractive on a farmhouse table. For this episode of "Knock It Off" we were on a tight budget, so we let the skinny legs remain (knowing our benches would cover them up), but it would be really simple to chunk out the legs by boxing them out with 1×3 pine. It's totally up to you.
Step 8:This step is optional, but if you're using inexpensive pine like we did, I'd suggest distressing your wood. It's going to get dinged up eventually, so this way it looks intentional and like it has loads of character! Plus, it's kinda fun!
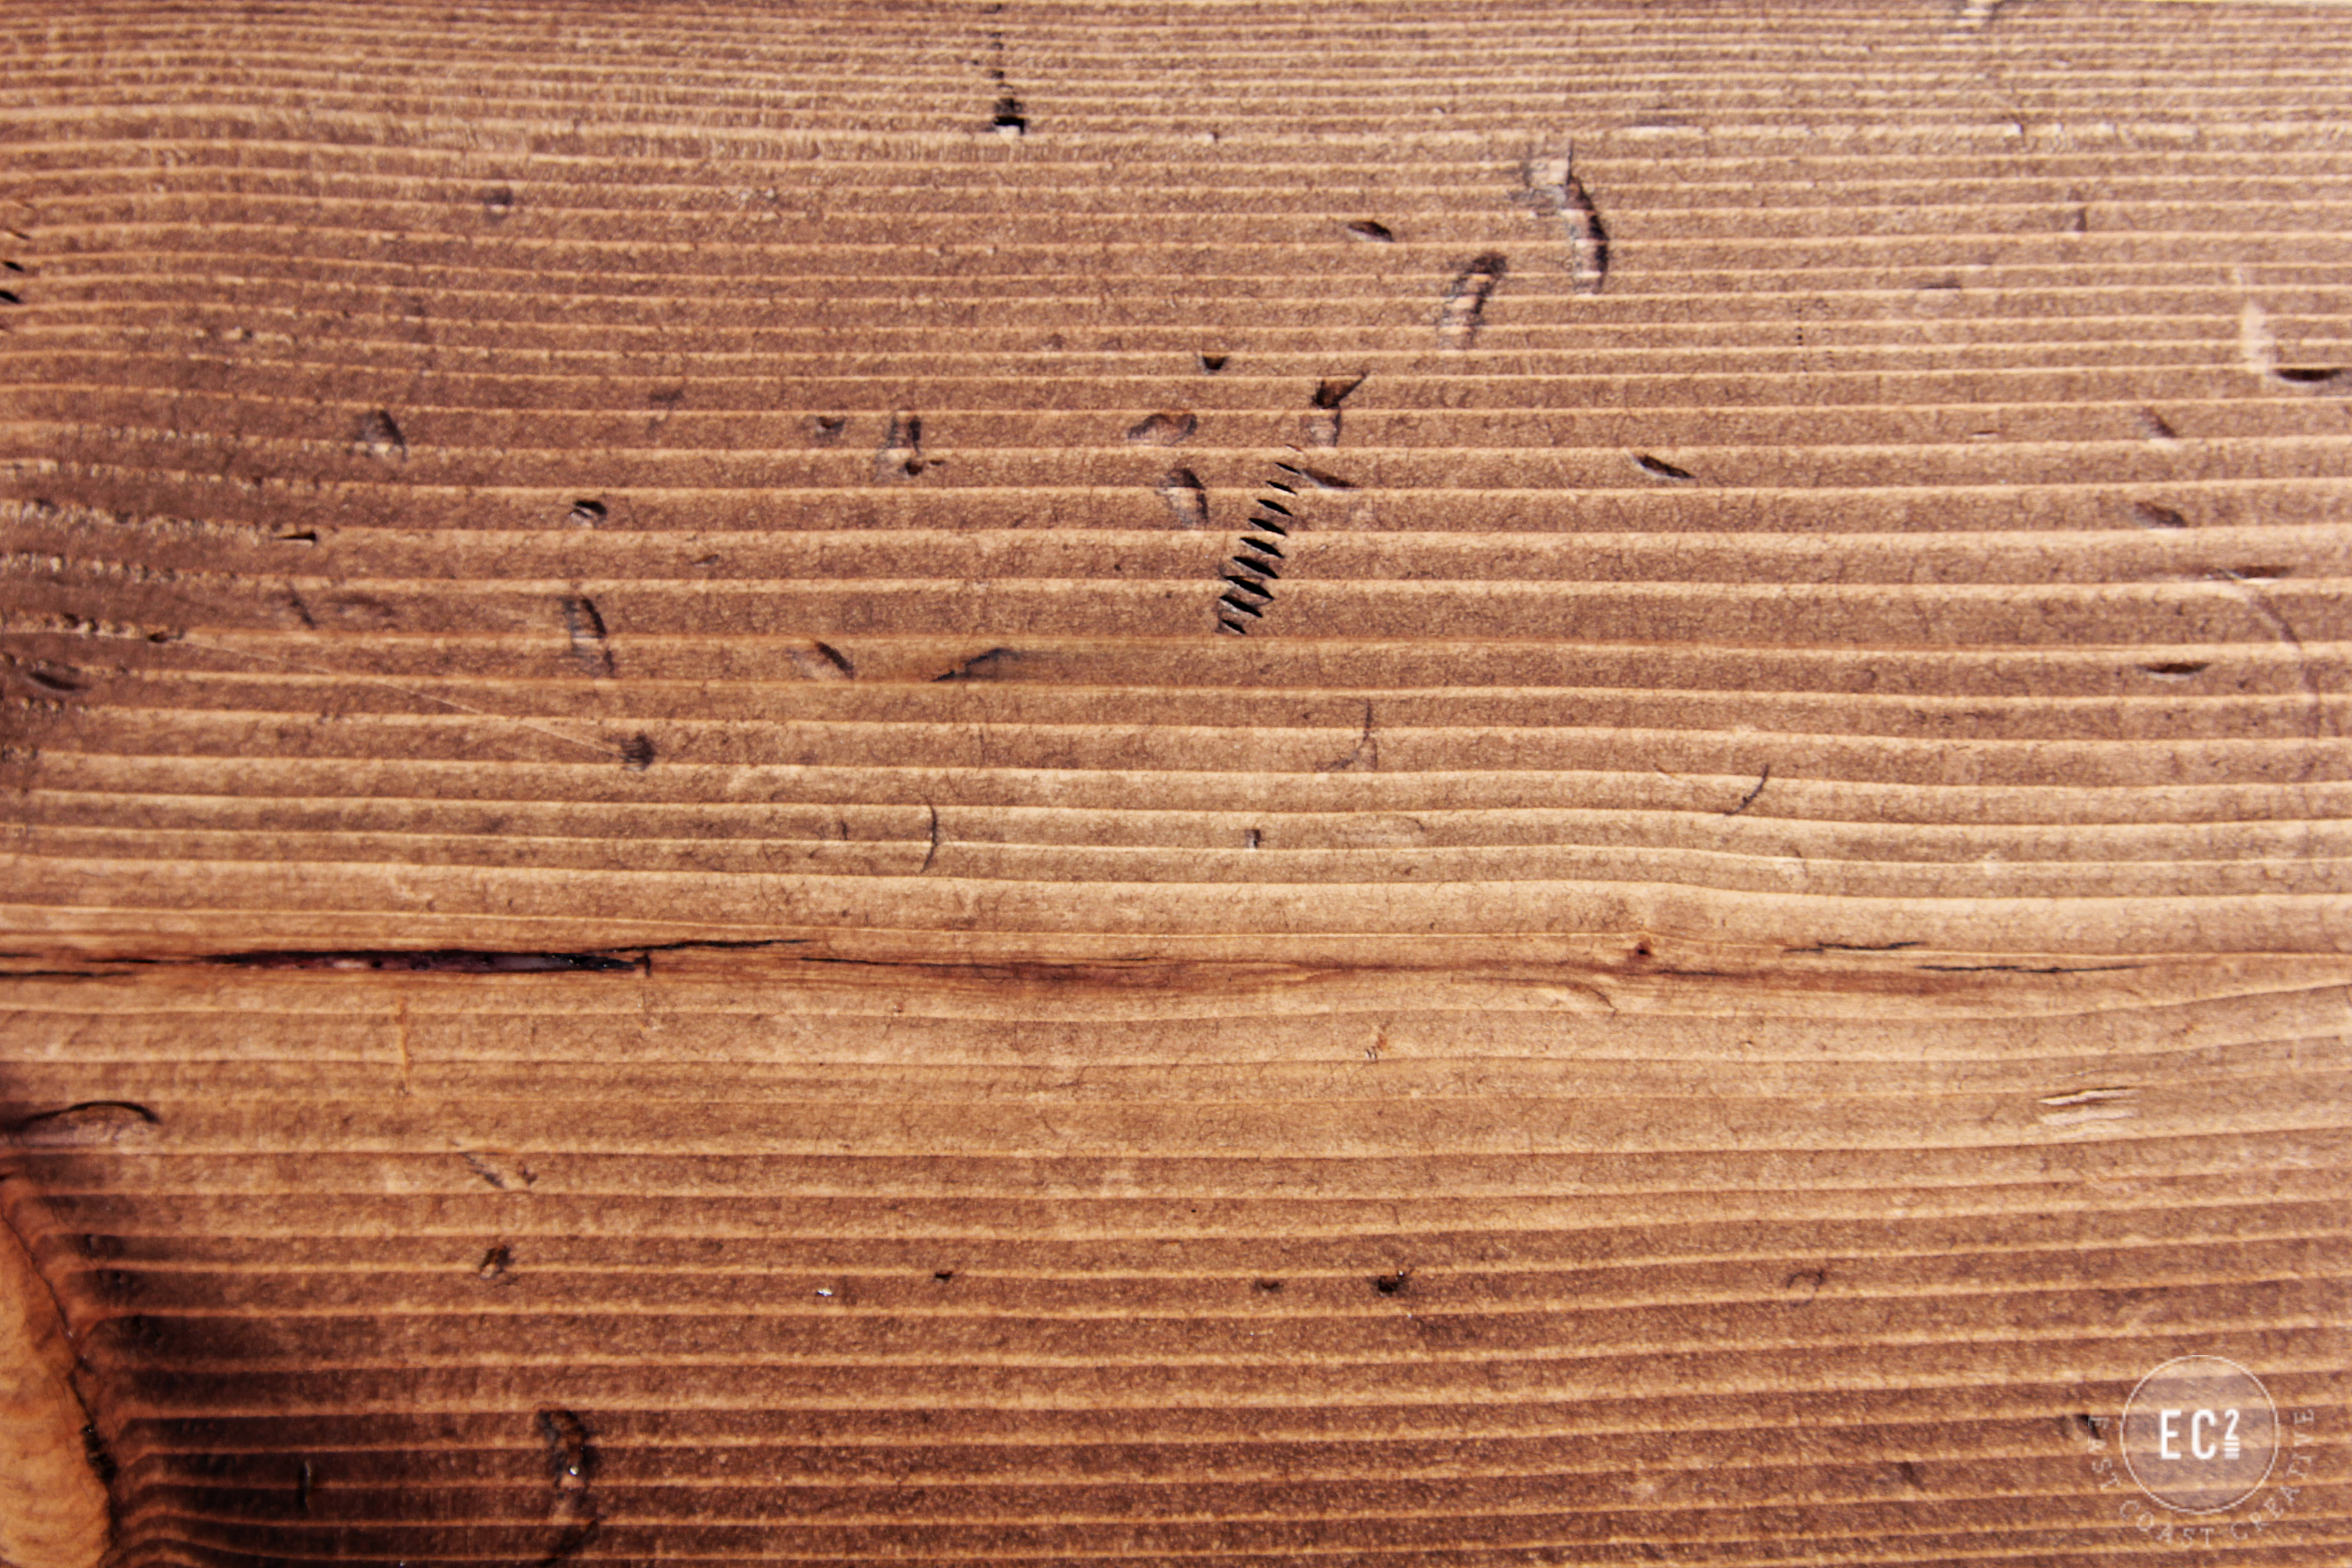
We usually distress with some household items…
The little screw marks are my favorite! I love seeing the thread lines- we pressed the screws into the wood to achieve that look. After the wood is stained the distressing really pops!
Step 9:Stain your table and then apply 2-3 coats of polyurethane to seal it.
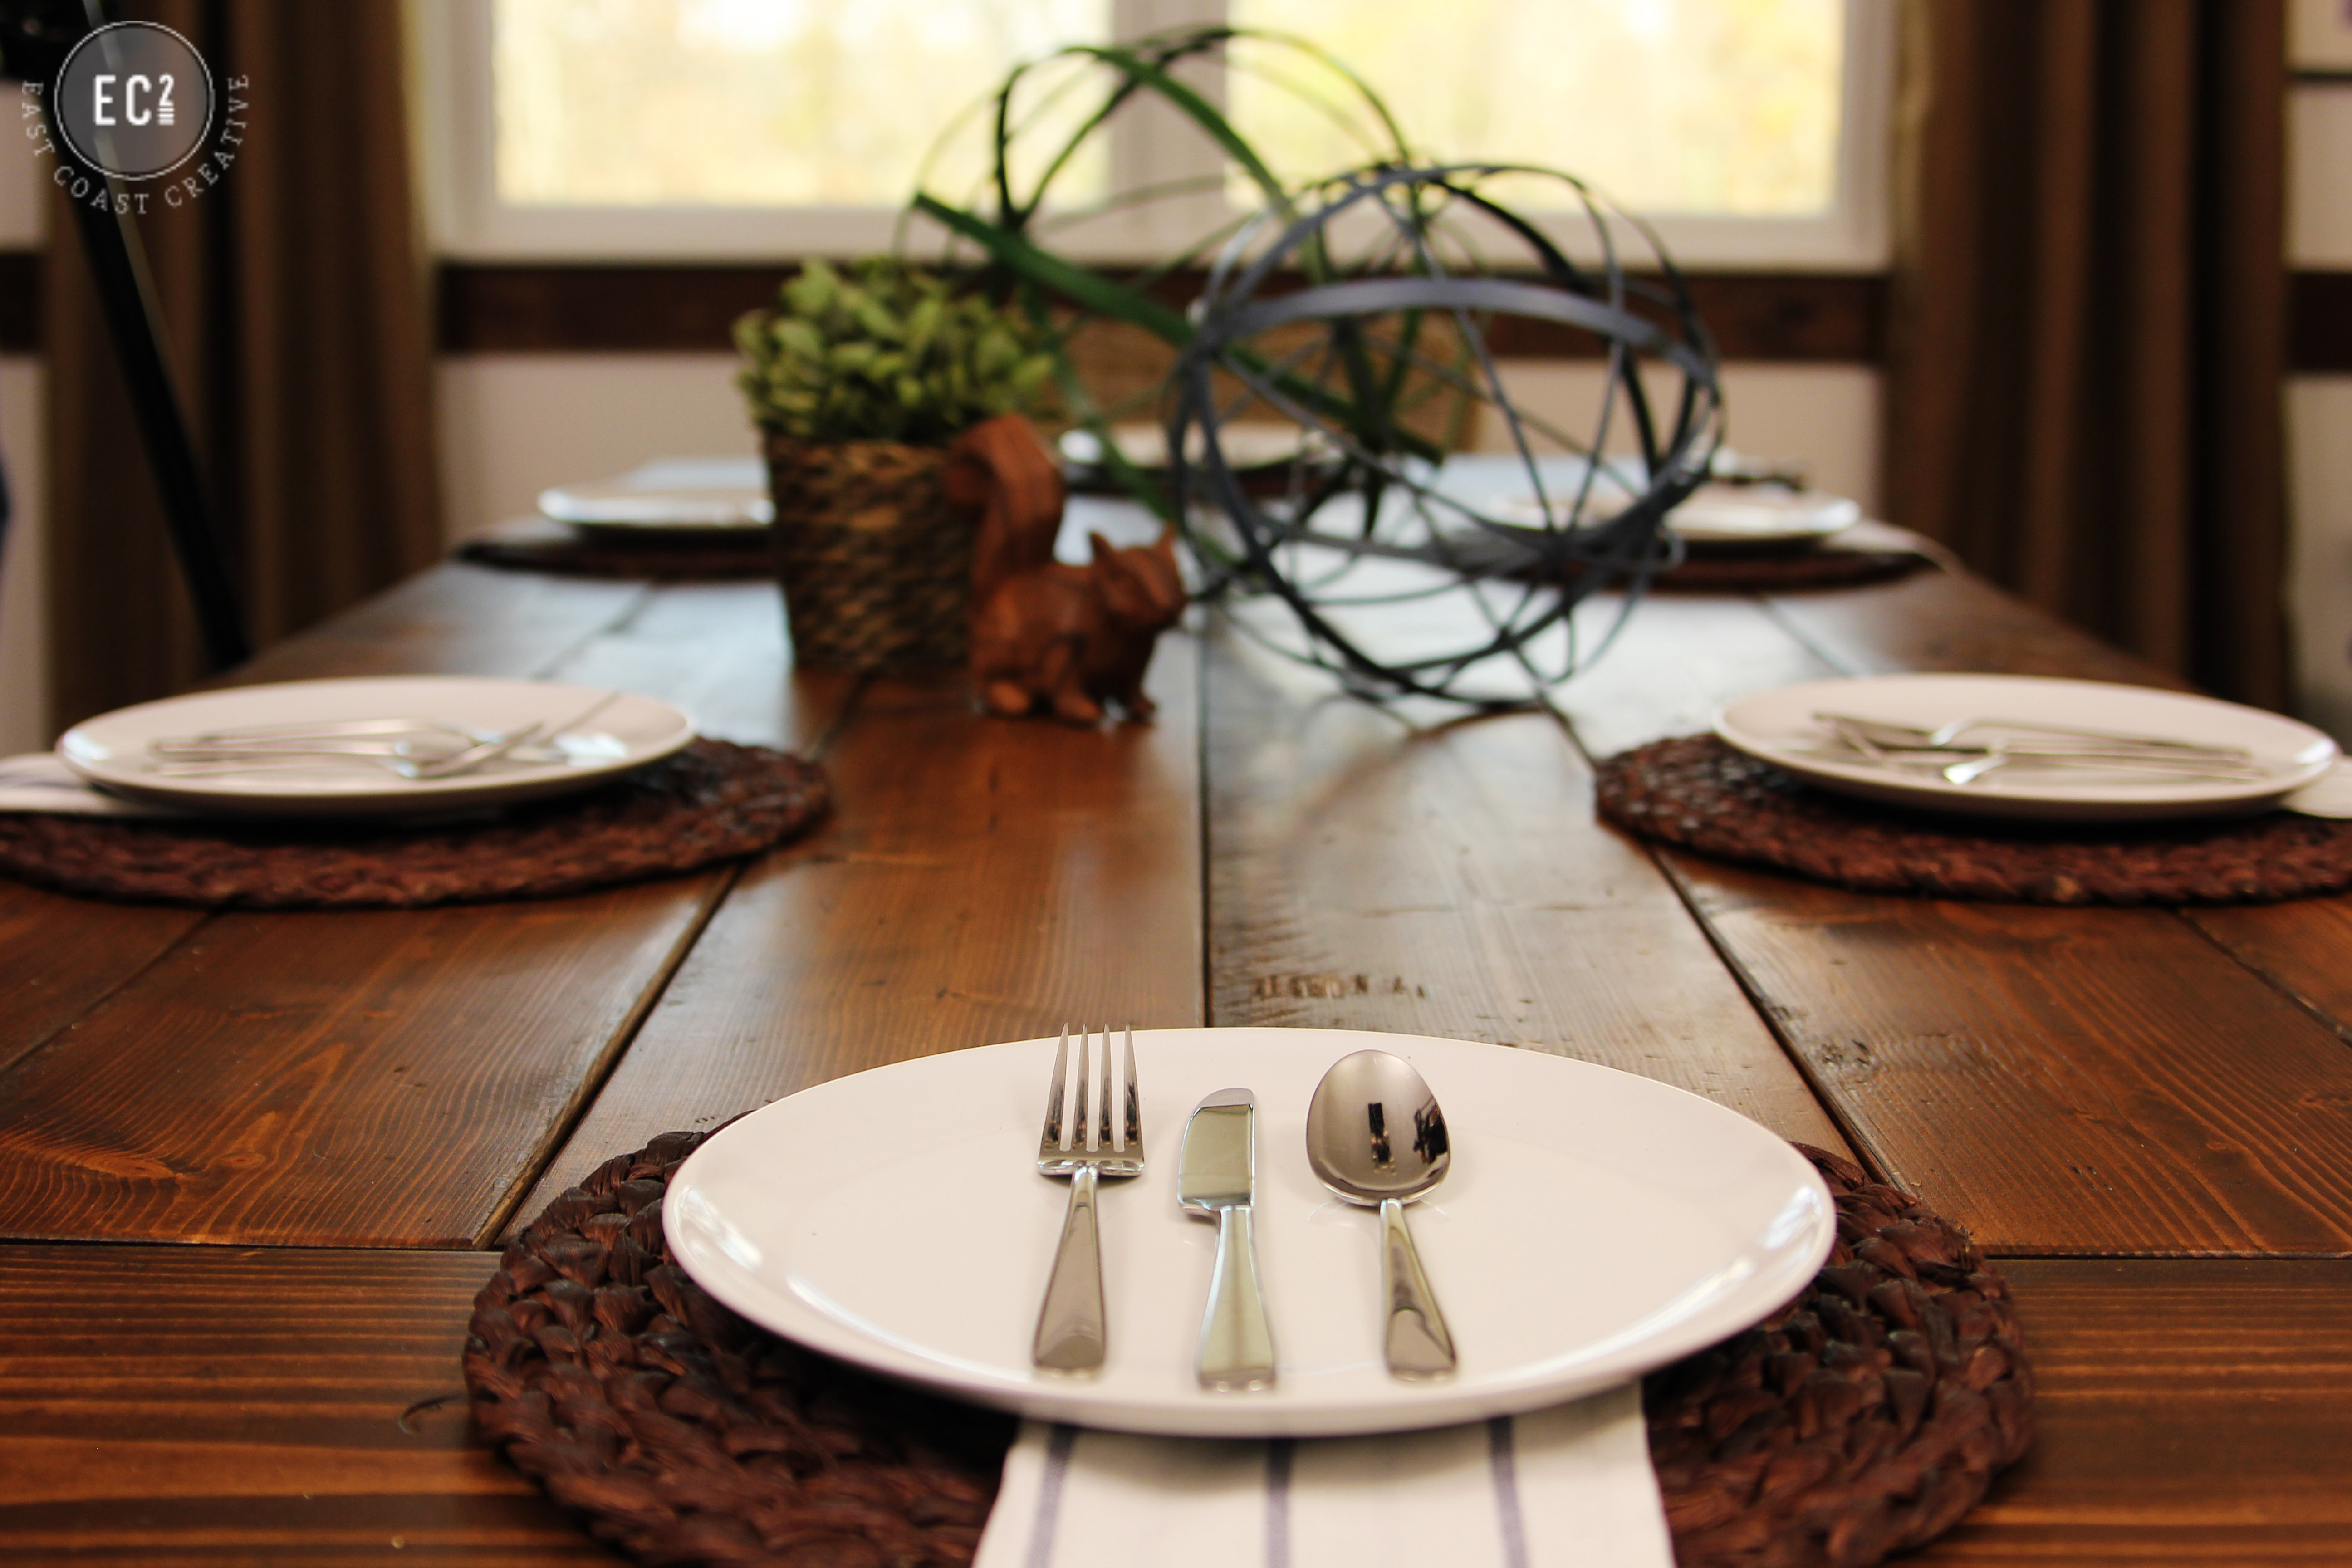
Seriously, can you believe this is an IKEA table? (well, two actually!)
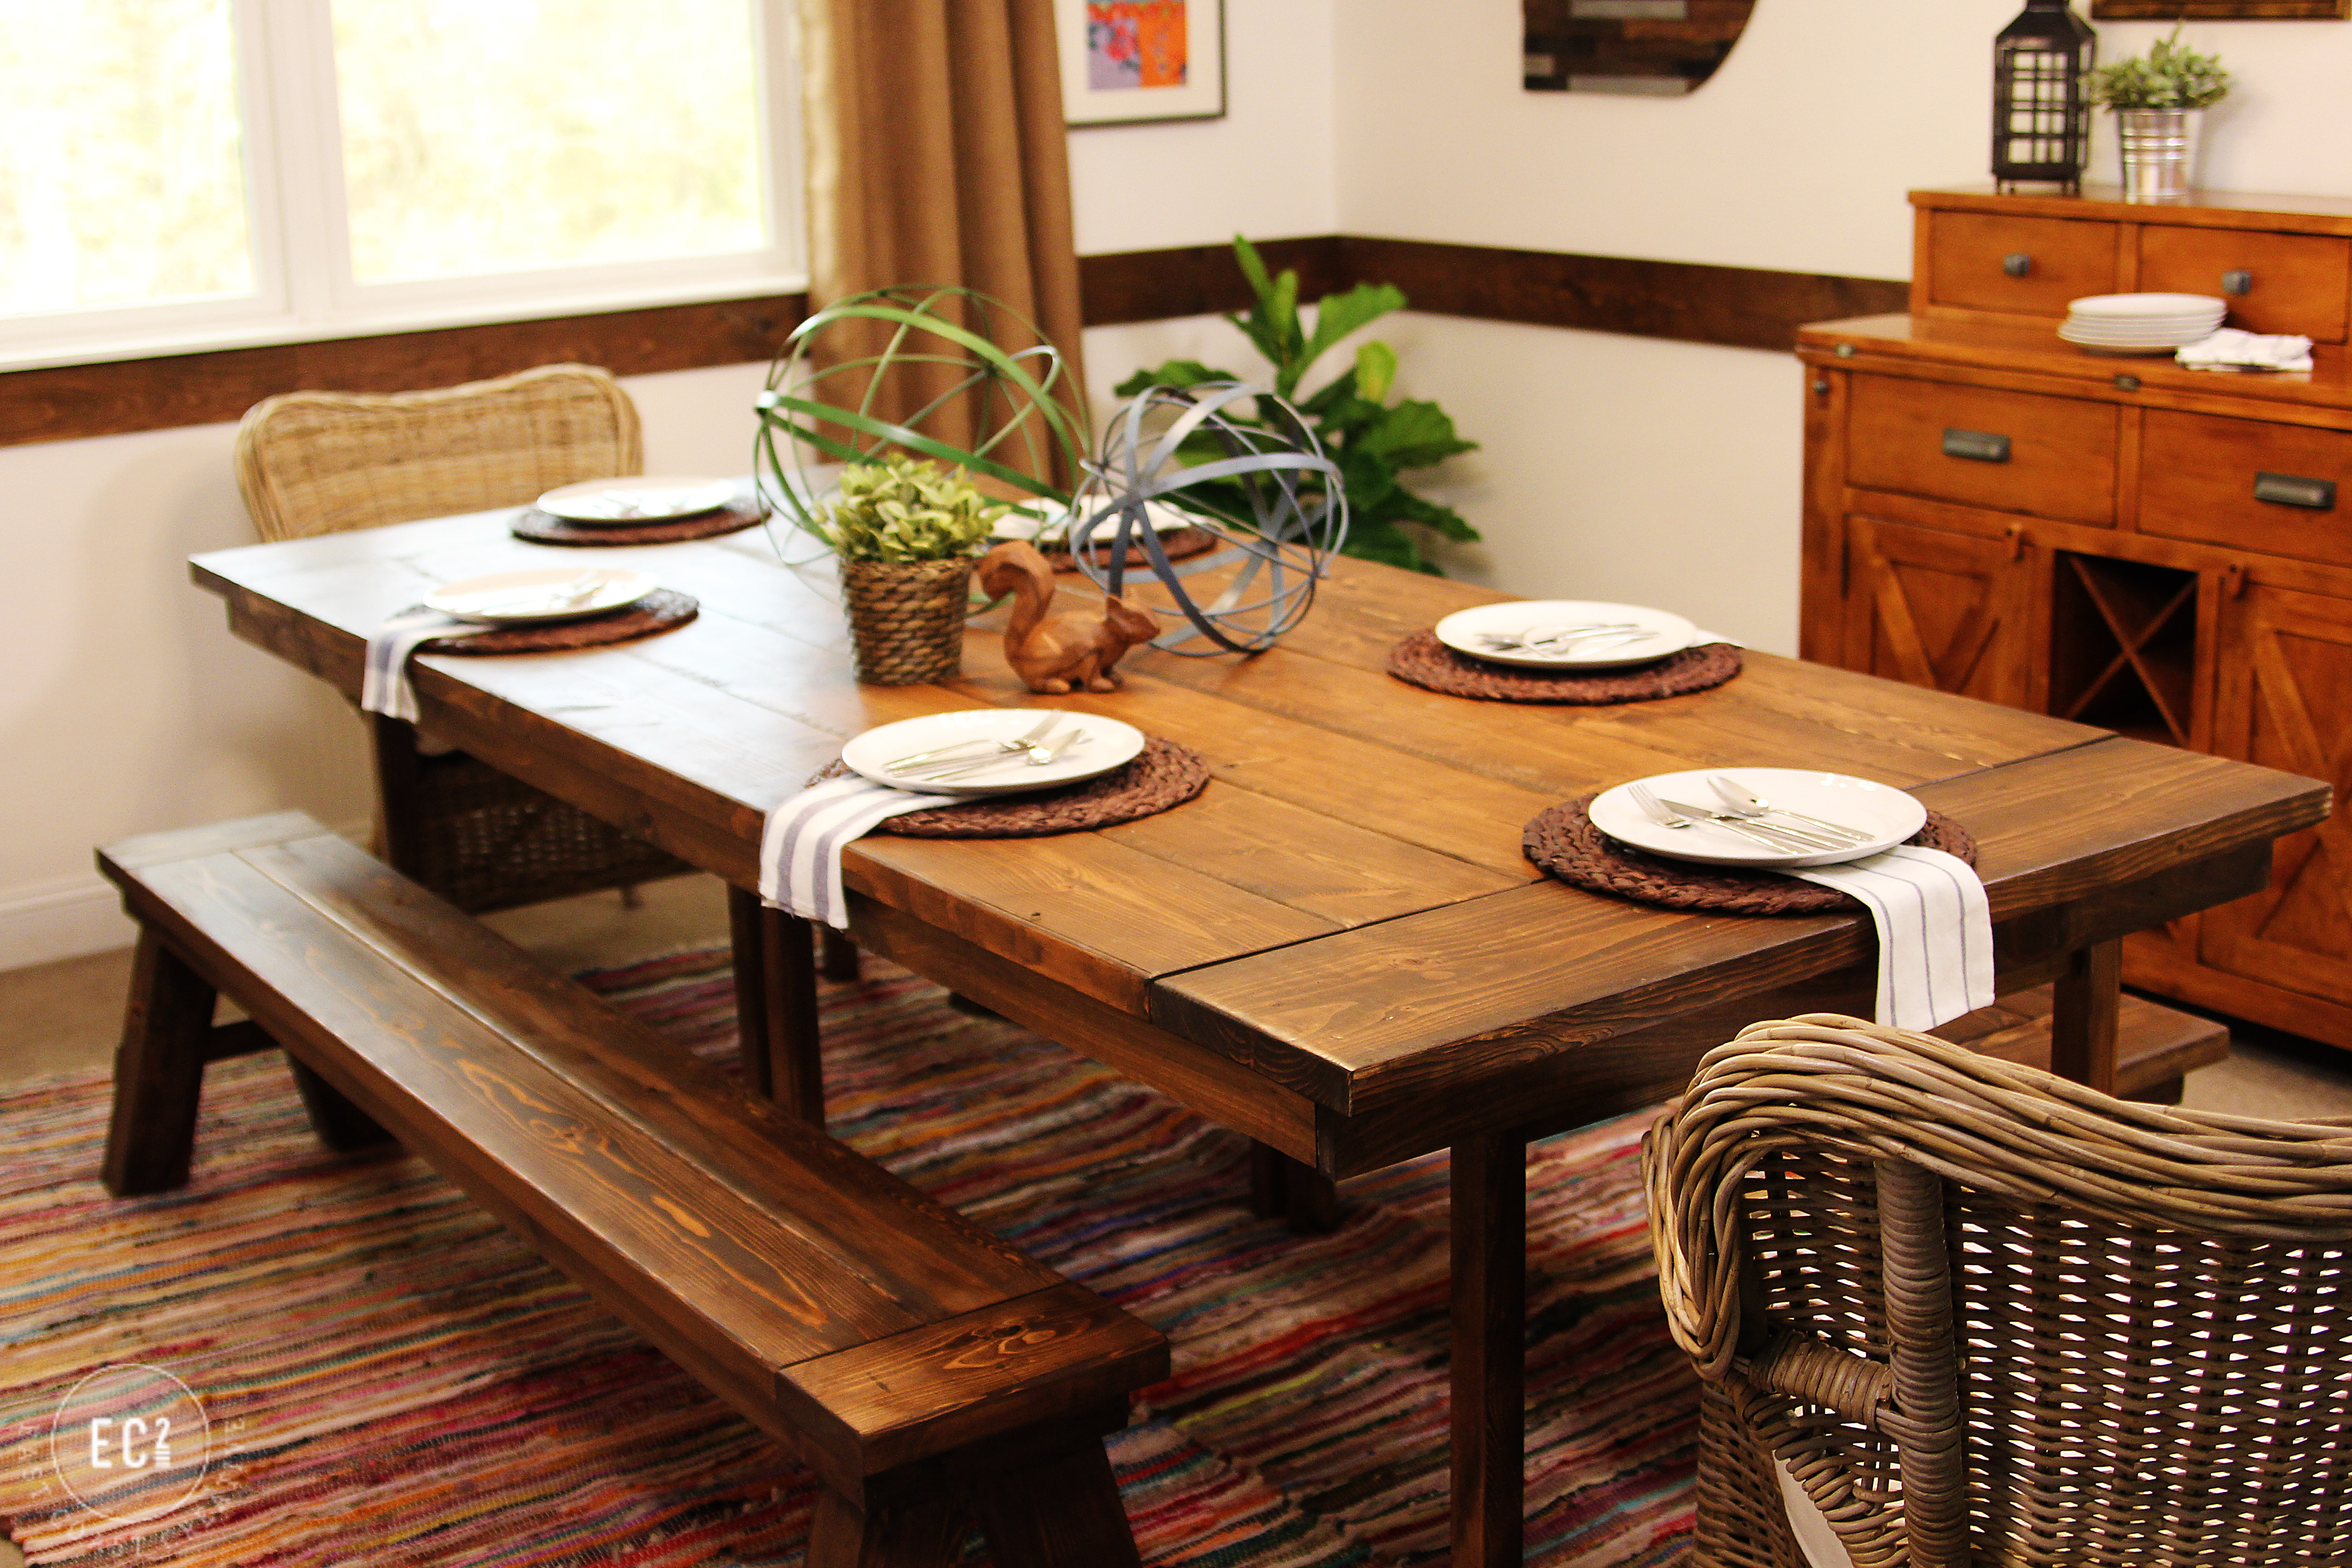
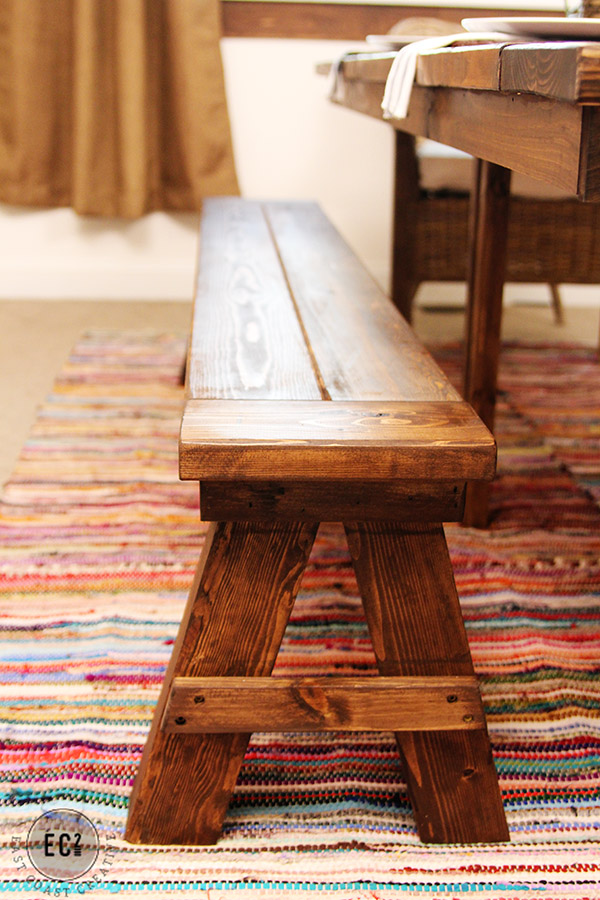
We used 2x4s and built simple benches rather than dish out a ton of money for chairs. I also like that they hide the skinny legs! Win-Win!
Under $200 for a HUGE farmhouse table that looks like it cost thousands.
And really, this is a great beginner DIY project. No complicated cuts and fancy tools required!
(now that you've seen the tutorial here's that materials checklist again!)
Printable Project Materials Checklist
You've also gotta check out the other tutorials for this room!
Check out the DIY Mason Jar Chandelier HERE

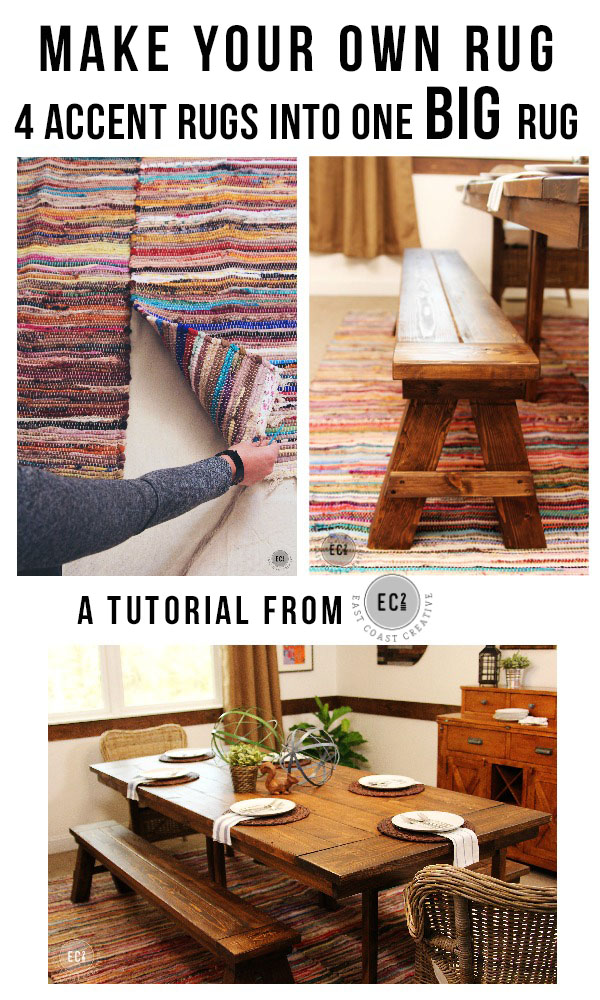
Check out how we made our huge Rag Rug for under $50 HERE!
So, what of you think of this IKEA hack? Do you think anyone would know it cost just $69 per table?
We don't think so!
If you missed this episode of "Knock It Off" you can watch it online HERE.
![]()
Q&A About this Project
Since this project is really popular- we've gotten a lot of questions. Here are some answers- hope they're helpful!
Q: Why would you work off of existing tables? If you can make this you can make one from scratch…
A: Umm… we disagree! After working with over 65 homeowners on our TV show and countless more just in life, we've found that the idea of build furniture can be intimidating. We love that this project is more like giving a major makeover to an existing table and you don't need to be the one making sure your table isn't going to crash down on Grandmom at Thanksgiving!! Also, this requires simple tools and cuts. But, if you want to build from scratch- more power to ya! We love that too!
Q:Can I just use one table?
A:Totally!! You'll use the exact same method, just skipping the part where you combine two tables together. I have a semi-ugly table in my breakfast nook and I'm thinking it's almost time for it to get a makeover!
Q:Is the table sturdy? Has it held up over time?
A:Yup! We've had the original version of this project for 4 years now and every Tuesday we have about 25 people over for dinner- if it can survive that, it can survive anything!! We used cheap pine wood, so it's distressed nicely, but if you wanted a harder wood- that would work great too!
Q:"Easiest DIY on the Planet??"
A:Okay, one thing you need to know about me (Monica)… I exaggerate things for dramatic effect. I'm constantly telling Jess that my stomach is eating me from the inside out when I'm hungry. I'm never just tired, I'm so tired that I'm going to die, and when something is "simple" it becomes "the easiest on the planet!" So, sorry if you were really expecting it to be made with tape and glue… I had already posted the graphic live when I realized the entire world didn't quite know about my tendency for exaggeration 🙂 It is pretty darn simple though, wouldn't ya say??
Did you know East Coast Creative's Most Popular Blog Project of all time is now for sale?!?
Get Ready to Break Up with Your Bedtime Routine!
Check out our online store!

engstromboser1997.blogspot.com
Source: https://eastcoastcreativeblog.com/2014/01/ikea-hack-build-a-farmhouse-table-the-easy-way.html
0 Response to "Easy Diy Farmhouse 6 Ft table Using Post"
Post a Comment